Intro to ROS Part 9: Launch Files
2025-11-20 | By ShawnHymel
Single Board Computers Raspberry Pi SBC
As you develop more ROS 2 nodes, managing them manually through individual terminal commands becomes inefficient. For simple debugging, launching nodes one at a time works fine, but as soon as your project grows to include multiple interacting components, you’ll want a better way to start everything at once. That’s where launch files come in.
In this tutorial, we’ll explore how ROS 2 launch files simplify node orchestration. You’ll learn how to define launch files in both XML and Python, set node parameters through launch files, and configure multiple nodes under a namespace. We’ll even show how to dynamically load different configuration files at runtime. Let’s dive in!
The Docker image and code for this series can be found here: https://github.com/ShawnHymel/introduction-to-ros
You can find the other tutorials in this series here.
Why Use Launch Files?
A launch file in ROS 2 automates the startup of multiple nodes. Instead of manually launching each component (e.g., publisher, subscriber, service servers), you can group them in a single file and start them with one command. Launch files can also include parameters, node names, and namespaces, making your system modular and easier to debug.
ROS 2 supports launch files in XML, Python, and YAML, although Python is the most flexible and commonly used. In this tutorial, we'll focus on XML for simple configurations and Python for more complex and dynamic setups. You can learn more about launch files here: https://docs.ros.org/en/jazzy/Tutorials/Intermediate/Launch/Creating-Launch-Files.html
Creating a Simple XML Launch File
Let’s say you have a publisher written in C++ (publisher_with_params) and a subscriber written in Python (minimal_subscriber). You want to launch both at once. Create a file in your C++ package under launch/pubsub_example_launch.xml:
<launch>
  <node pkg="my_cpp_pkg" exec="publisher_with_params" />
  <node pkg="my_py_pkg" exec="minimal_subscriber" />
</launch>
To support launch files in your package, update package.xml with the following dependencies:
<depend>my_interfaces</depend>

<exec_depend>ros2launch</exec_depend>

<test_depend>ament_lint_auto</test_depend>
In CMakeLists.txt, install the launch files:
...

# Install launch files
install(
 DIRECTORY launch
 DESTINATION share/${PROJECT_NAME}/
)

ament_package()
Rebuild your package and launch it:
colcon build --packages-select my_cpp_pkg
source install/setup.bash
ros2 launch my_cpp_pkg pubsub_example_launch.xml
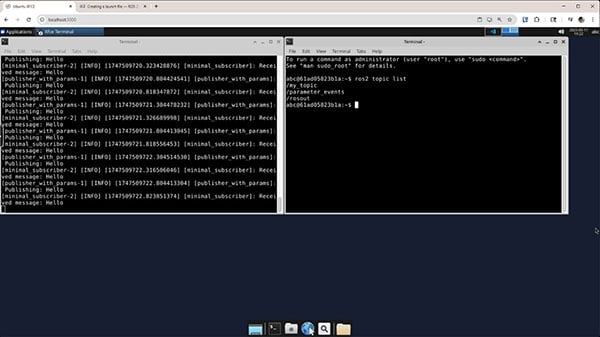
Use ros2 topic list and rqt_graph to verify that both nodes are running and communicating.

Naming and Namespacing in XML
Let’s make the launch more robust by specifying names and namespaces. Modify your launch file:
<launch>
    <node
        pkg="my_cpp_pkg"
        exec="publisher_with_params"
        namespace="talkie"
        name="publisher"
    >
        <param name="message" value="Greetings!" />
        <param name="timer_period" value="0.5" />
    </node>
    <node
        pkg="my_py_pkg"
        exec="minimal_subscriber"
        name="subscriber_1"
    />
    <node
        pkg="my_py_pkg"
        exec="minimal_subscriber"
        namespace="talkie"
        name="subscriber_2"
    />
    <node
        pkg="my_py_pkg"
        exec="minimal_subscriber"
        namespace="talkie"
        name="subscriber_3"
    />
</launch>
Note that we gave each node a unique name so that it's easily identifiable. We also included namespaces, which group nodes together under that namespace. Publishers, subscribers, and servers/clients can only communicate if the topic or service is in the same namespace. Rebuild the package:
colcon build --packages-select my_cpp_pkg
In one terminal, launch your application:
source install/setup.bash
ros2 launch my_cpp_pkg/launch/pubsub_example_launch.xml
In another node, check that the application is running:
ros2 topic list
ros2 topic info /talkie/my_topic
In a third terminal, you can use rqt_graph to confirm all three nodes are connected via the same topic.

Creating a Python Launch File in a New Package
Python launch files offer more flexibility for conditional logic, delays, or reading from external files. In many cases, you will want to keep your launch files in a separate package to keep your workspace organized. Create a new package for launch configurations:
ros2 pkg create --build-type ament_python my_bringup
Inside my_bringup, create launch/pubsub_example_launch.py:
from launch import LaunchDescription
from launch_ros.actions import Node

def generate_launch_description():
    """Launch multiple nodes"""

    # Create a launch description
    ld = LaunchDescription()
    nodes = []

    # Publisher node
    nodes.append(Node(
        package='my_cpp_pkg',
        executable='publisher_with_params',
        namespace='talkie',
        name='publisher',
        parameters=[{
            'message': "Greetings!",
            'timer_period': 0.5,
        }]
    ))

    # Subscriber node 1
    nodes.append(Node(
        package='my_py_pkg',
        executable='minimal_subscriber',
        name='subscriber_1',
    ))

    # Subscriber node 2
    nodes.append(Node(
        package='my_py_pkg',
        executable='minimal_subscriber',
        namespace='talkie',
        name='subscriber_2'
    ))

    # Subscriber node 3
    nodes.append(Node(
        package='my_py_pkg',
        executable='minimal_subscriber',
        namespace='talkie',
        name='subscriber_3'
    ))

    # Add nodes to launch description
    for node in nodes:
        ld.add_action(node)

    return ld
The generate_launch_description() function serves as the entry point for a Python-based ROS 2 launch file. When executed by the ros2 launch command, this function returns a LaunchDescription object that defines the set of nodes and actions to be executed. Inside the function, you can declare arguments, configure nodes with parameters, and dynamically generate launch behavior based on conditions or substitutions. This flexibility allows you to write sophisticated launch scripts that can, for example, choose between debug and production settings, load external YAML configurations, or delay node startup. Ultimately, generate_launch_description() is how you define and control the startup logic for a complex ROS 2 system using Python code.
Update package.xml to include the ros2launch dependency:
<exec_depend>ros2launch</exec_depend>

<test_depend>ament_copyright</test_depend>
Update setup.py to include the launch files:
data_files=[
       ('share/ament_index/resource_index/packages', ['resource/' + package_name]),
       ('share/' + package_name, ['package.xml']),
       ('share/' + package_name + '/launch', [
           'launch/pubsub_example_launch.py'
       ]),
],
Build the launch package:
colcon build --packages-select my_bringup
In your run terminal, launch your application:
source install/setup.bash
ros2 launch my_bringup pubsub_example_launch.py
If you run rqt_graph, you should see that we have the same configuration of nodes as we did with the XML example.

Using YAML Configuration Files
Python launch files allow you to load configuration values from YAML files. Create two files in the workspace/src/my_bringup/config directory:
pubsub_debug.yaml
talkie:
  publisher_1:
    ros__parameters:
      message: "Greetings!"
      timer_period: 1.0

  publisher_2:
    ros__parameters:
      message: "Debug mode"
      timer_period: 2.0
pubsub_prod.yaml
/talkie/publisher_1:
  ros__parameters:
    message: "Doing stuff"
    timer_period: 0.5

/talkie/publisher_2:
  ros__parameters:
    message: "Production mode"
    timer_period: 2.0
Now create a new launch file launch/pubsub_config_launch.py:
from launch import LaunchDescription
from launch.actions import DeclareLaunchArgument
from launch.substitutions import LaunchConfiguration, PathJoinSubstitution
from launch_ros.actions import Node
from launch_ros.substitutions import FindPackageShare

def generate_launch_description():
    """Launch multiple nodes"""

    # Create a dynamic object that will have a value at runtime
    config_file = LaunchConfiguration('config_file')

    # Declare a launch argument for the YAML config file name
    config_file_arg = DeclareLaunchArgument(
        'config_file',
        default_value='pubsub_debug.yaml',
        description="Path to the YAML config file"
    )

    # Build the full path to the config file at runtime
    config_path = PathJoinSubstitution([
        FindPackageShare('my_bringup'),
        'config',
        config_file,
    ])

    # Create a launch description
    ld = LaunchDescription()
    nodes = []

    # Publisher 1 node
    nodes.append(Node(
        package='my_cpp_pkg',
        executable='publisher_with_params',
        namespace='talkie',
        name='publisher_1',
        parameters=[config_path]
    ))

    # Publisher 2 node
    nodes.append(Node(
        package='my_cpp_pkg',
        executable='publisher_with_params',
        namespace='talkie',
        name='publisher_2',
        parameters=[config_path]
    ))

    # Subscriber node
    nodes.append(Node(
        package='my_py_pkg',
        executable='minimal_subscriber',
        namespace='talkie',
        name='subscriber_1'
    ))

    # Add argument(s) to launch description
    ld.add_action(config_file_arg)

    # Add nodes to launch description
    for node in nodes:
        ld.add_action(node)

    return ld
Update your setup.py to install the config files as well:
data_files=[
        ('share/ament_index/resource_index/packages',
            ['resource/' + package_name]),
        ('share/' + package_name, ['package.xml']),
        ('share/' + package_name + '/launch', [
            'launch/pubsub_example_launch.py',
            'launch/pubsub_config_launch.py',
        ]),
        ('share/' + package_name + '/config', [
            'config/pubsub_debug.yaml',
            'config/pubsub_prod.yaml',
        ])
],
Build the package:
colcon build --packages-select my_bringup
In one terminal, run the application with the default configuration:
source install/setup.bash
ros2 launch my_bringup pubsub_config_launch.py
Press Ctrl+C to stop those nodes. Then, try running the application again with our debug profile:
ros2 launch my_bringup pubsub_config_launch.py config_file:=pubsub_prod.yaml
You should see all of your nodes printing to the terminal.

Conclusion
Launch files are a core part of building scalable ROS 2 applications. Whether you're spinning up two nodes or orchestrating an entire robot stack, launch files let you define behavior once and reuse it consistently. XML files are quick and readable for small projects, while Python offers dynamic configuration and full scripting power.
In this tutorial, we explored how to write both XML and Python launch files, how to namespace and name nodes properly, and how to dynamically load YAML configuration files. At this point, we’ve covered all of the basics of ROS 2. You should be ready to write a variety of production-ready, scalable robotics applications! Over the course of the next few episodes, we will dive into the TF2 transform library.
Stay tuned!


